The nuances of manufacturing high-quality furniture conductor, do it yourself
Furniture conductor - a simple mechanical device, which serves to accelerate and simplify actions when drilling holes. Using this device allows you to create technological holes without pre-applied markings and do it with perfect accuracy, as well as accurate slope. The fixture is indispensable during the assembly of furniture structures, during carpentry. For use in everyday life and in the production of small volumes, it is very easy to make a furniture conductor with your own hands.
What is its purpose
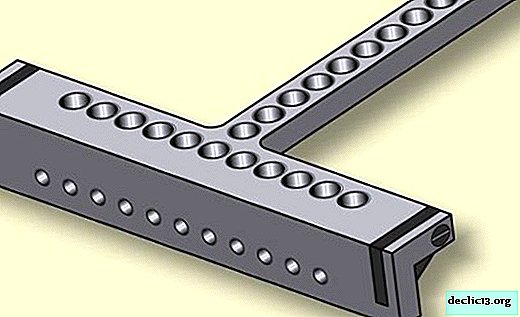
In fact, the jig for furniture is an ordinary pattern with holes of the desired diameter. The working part of the device is a rectangular block of solid material with holes located according to the necessary marking. For convenience, it can be equipped with adjusting and locking mechanisms. Based on the simplicity of the design, you can quickly make stencils for furniture with your own hands from improvised means.
The jig provides the desired direction of the drill at an angle of 90 degrees to the surface, eliminating the possibility of deviation. This is especially important when working with narrow pieces of furniture, such as the ends of walls or doors. Without this device, it is quite difficult to maintain the desired angle, which can lead to marriage, because even a slight deviation in the direction of the mounting hole may make it impossible to assemble individual elements into a single structure.
For the perfect fit of the furniture elements to each other, the accuracy of the location of the holes for fasteners is also of great importance. Those who make furniture with their own hands often face the need to create a series of identical holes at a certain distance from each other. To facilitate the work, make it faster, it’s easier not to make a markup every time, but to apply a template.
Using a conductor, you can work with different furniture materials: wood, particleboard, MDF.


Choosing a model for manufacturing
Industrial conductors are highly specialized and universal. Templates of the first type are used to perform certain operations on standard parts. Universal devices are suitable for working with different materials and objects of various configurations.
According to design features and functionality, conductors are divided into the following types:
- waybills - when used, they are applied to the surface in the desired area, fixing with clamps or holding with your hand. They are used for drilling holes in flat parts;
- rotary - the working part moves in both vertical and horizontal planes. It is used when working with elements of complex geometric shape and to create holes whose axis should be at an angle;
- Tilting - used to create holes in perpendicular planes.
To mark the places for drilling holes, a marking conductor is used. It is much thinner and lighter.
The conductor device can be specially created for a certain type of fixture: dowels, confirmations, screws, corners. There are devices to simplify the installation process of fittings.
According to the type of fixation, furniture conductors can be sliding or fixed. The former freely move on the surface if necessary, the latter are rigidly fixed in the right place. The presence of an adjustment mechanism will help to combine the device with various types of workpieces.
For large furniture manufacturers, the availability of a variety of additional fixtures plays a decisive role, since they significantly reduce time costs. In this case, the value of the instruments does not matter much. A completely different approach to the purchase of the necessary equipment from those who have a small production of furniture or from independent craftsmen who manufacture certain types of furniture. In this case, making furniture patterns with your own hands is much cheaper and more practical. The choice of the necessary options, the complexity of the fixture is determined not only by production necessity, but also by the skill and experience of furniture manufacturers.
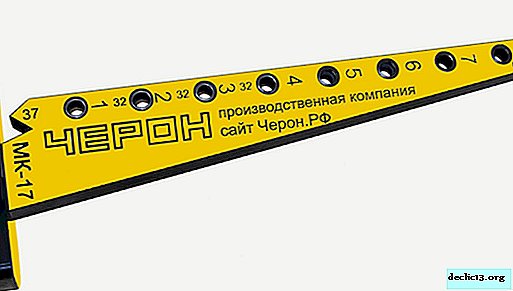 Overhead
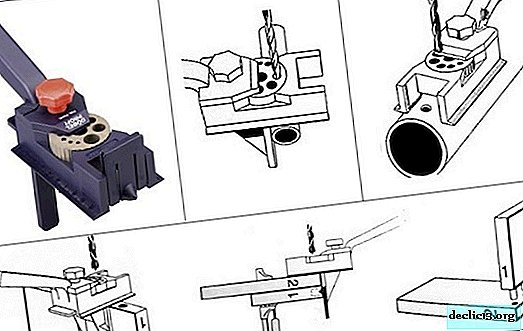 Turning
 Universal
Materials and Tools
To make a device, you must first decide on the tasks that it will perform. Accordingly, the necessary material is selected from which the furniture template will be made with its own hands. The most durable, reliable and "long-playing" metal conductor is considered. To create a furniture conductor for self-drilling, it is permissible to use wood, plywood, textolite, plexiglass. This is due to lower labor costs and low material cost. All this is important, especially if you are going to make several different templates yourself.
For the manufacture of a conductor, a piece of reinforcement, a bar or a plate is suitable - something that is likely to be found in any garage or in a home workshop. To make a simple marking device, you can take the usual school ruler - wooden, plastic or metal.
Crucial in the manufacture of the conductor is the accurate calculation of the location of the holes on the workpiece. You can take a ready-made scheme or make it yourself. The latter option is preferable, since the dimensions in the drawings should correspond to the tasks being solved.
From the tools you will need:
- drill;
- grinder or jigsaw;
- a set of locksmith tools;
- clamps;
- vise.
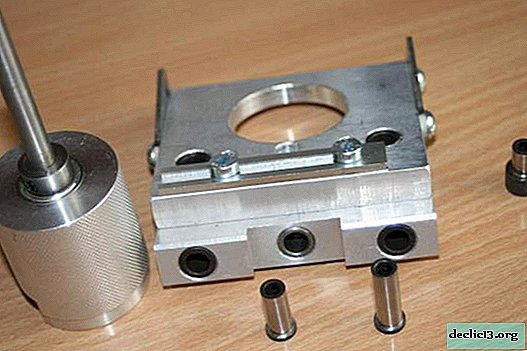
 In the manufacture of the conductor you will need perfectly accurate drilling of the guide holes and hardening of the finished device
 Drawing a homemade conductor for drilling holes for confirmations
Manufacturing steps
Consider the process of creating a metal conductor device for confirmations. This fixture is most often used when assembling furniture:
- a piece of the required length is cut off from a metal bar of square section (10x10 mm) using a grinder. The ends of the obtained segment with a file are leveled and cleaned from burrs. Corners and ribs can be rounded for convenience and safety of use;
- holes are marked on the workpiece. Their centers should be located at a distance of 8 mm from the side face (chipboard sheet thickness - 16 mm). From the end and between the holes should be 32 mm, according to the generally accepted system of furniture fixtures. For marking, you can use a carpentry corner or a vernier caliper. It is better to mark the details with a sharp metal object - an awl or a large needle. You can use the core and hammer to make holes for the initial installation of the drill. It is important when drilling holes to prevent drill drift and make them strictly perpendicular to the surface of the workpiece;
- make holes with a diameter of 5 mm;
- to create an emphasis, you need to cut a piece of the desired length from a metal plate (1x25 mm);
- process the edges with sandpaper;
- bend the workpiece at a right angle, clamping in a vice. Fold the details, aligning them coaxially;
- fasten the parts in this position with a clamp;
- on the side of the plate along the length of the device and at the end, drill holes corresponding to the size of the screw. Thread and fasten parts;
- cut off the excess thrust plate, process the edges.


